"As an Amazon Associate, I earn from qualifying purchases. This post contains affiliate links"
Peloton bicycles are well-known for their high standards of quality and cutting-edge design. The original Peloton Bike made the company famous; it’s a motionless bike with a screen on the front and speakers in the back that plays one of the thousands of sessions available with a Peloton All-Access subscription while you work out.
Peloton provides home gym equipment, has a workout app, and creates training videos that clients may live-stream via Peloton devices.
The touchscreen is intricate; thus, removing it is safer and reduces the bike’s weight. You should not take risks while moving it over a long distance or upstairs.
This article discusses how to remove the peloton screen to protect your Peloton bike screen.
How To Remove The Screen From The Peloton Bike
We understand that you are as devoted to your Peloton as we are, but there are moments when you must dismount. Even if you’re changing places or thoroughly cleaning, here’s how to remove and reconnect your Peloton screen correctly.
- We barely discussed Best Pivot For Peloton Screens in our previous articles.
What You Must Have:
- A screwdriver with a Phillips-head
- A little flat-head screwdriver
- A workmate (for an extra set of hands)
1. Turn Off Everything
To begin, you must power down the whole Peloton system. This action will protect you when working with cables and other electrical components. It will also protect your Peloton from damage when you detach the screen from the cycle.
You should turn off the following elements in your system:
- The display: Press and hold the power button until prompted, then shut down the system.
- The bicycle: The bicycle should switch off simultaneously with the Peloton display.
- The general power connection: Unplug the power wire from the wall to terminate the Peloton’s power supply.
Turning them off will ensure the safety of your Peloton cycle.
Before proceeding to the following stage, confirm that your bicycle is disconnected from the power supply and that everything is turned off. Your Peloton will fare considerably better if this precaution is taken.
2. Open And Disable
Before removing the screen from the bike, you must unhook several components. Most of them are situated underneath the screen and link the projections on the screen to the Peloton. That will harm each of these if you neglect to disconnect them before removing the gadget from the bicycle.
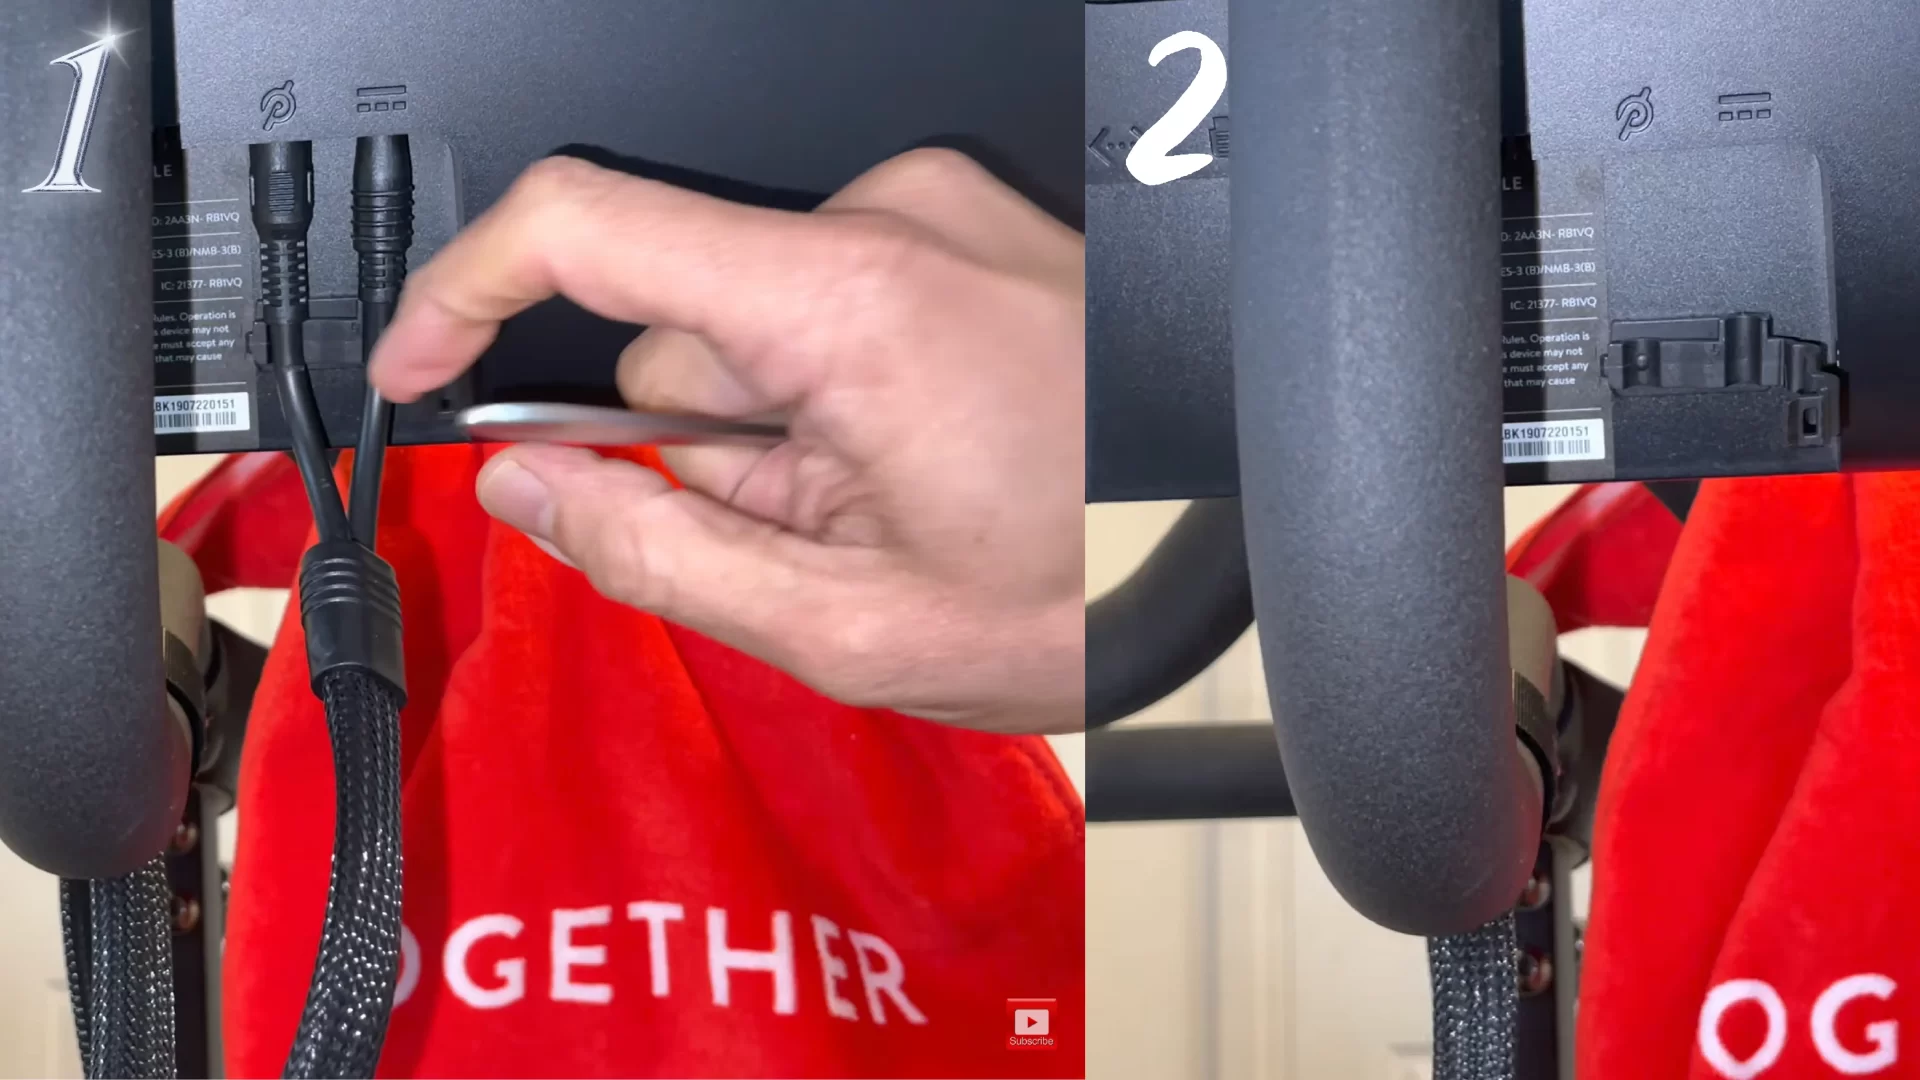
The following objects need to be disconnected:
- You may find a plastic clip on the rear of the touchscreen.
- Monitor cable: Once the plastic clip has been removed, the monitor screen may be unplugged from the Peloton cycle.
- Ethernet and audio cables: Remove any excess Ethernet and audio cords from the bicycle.
These should be easy to manage, and the process should take just a few seconds.
After disconnecting all wires and cords, you are almost finished. A few further procedures are necessary to prepare your Peloton screen for removal.
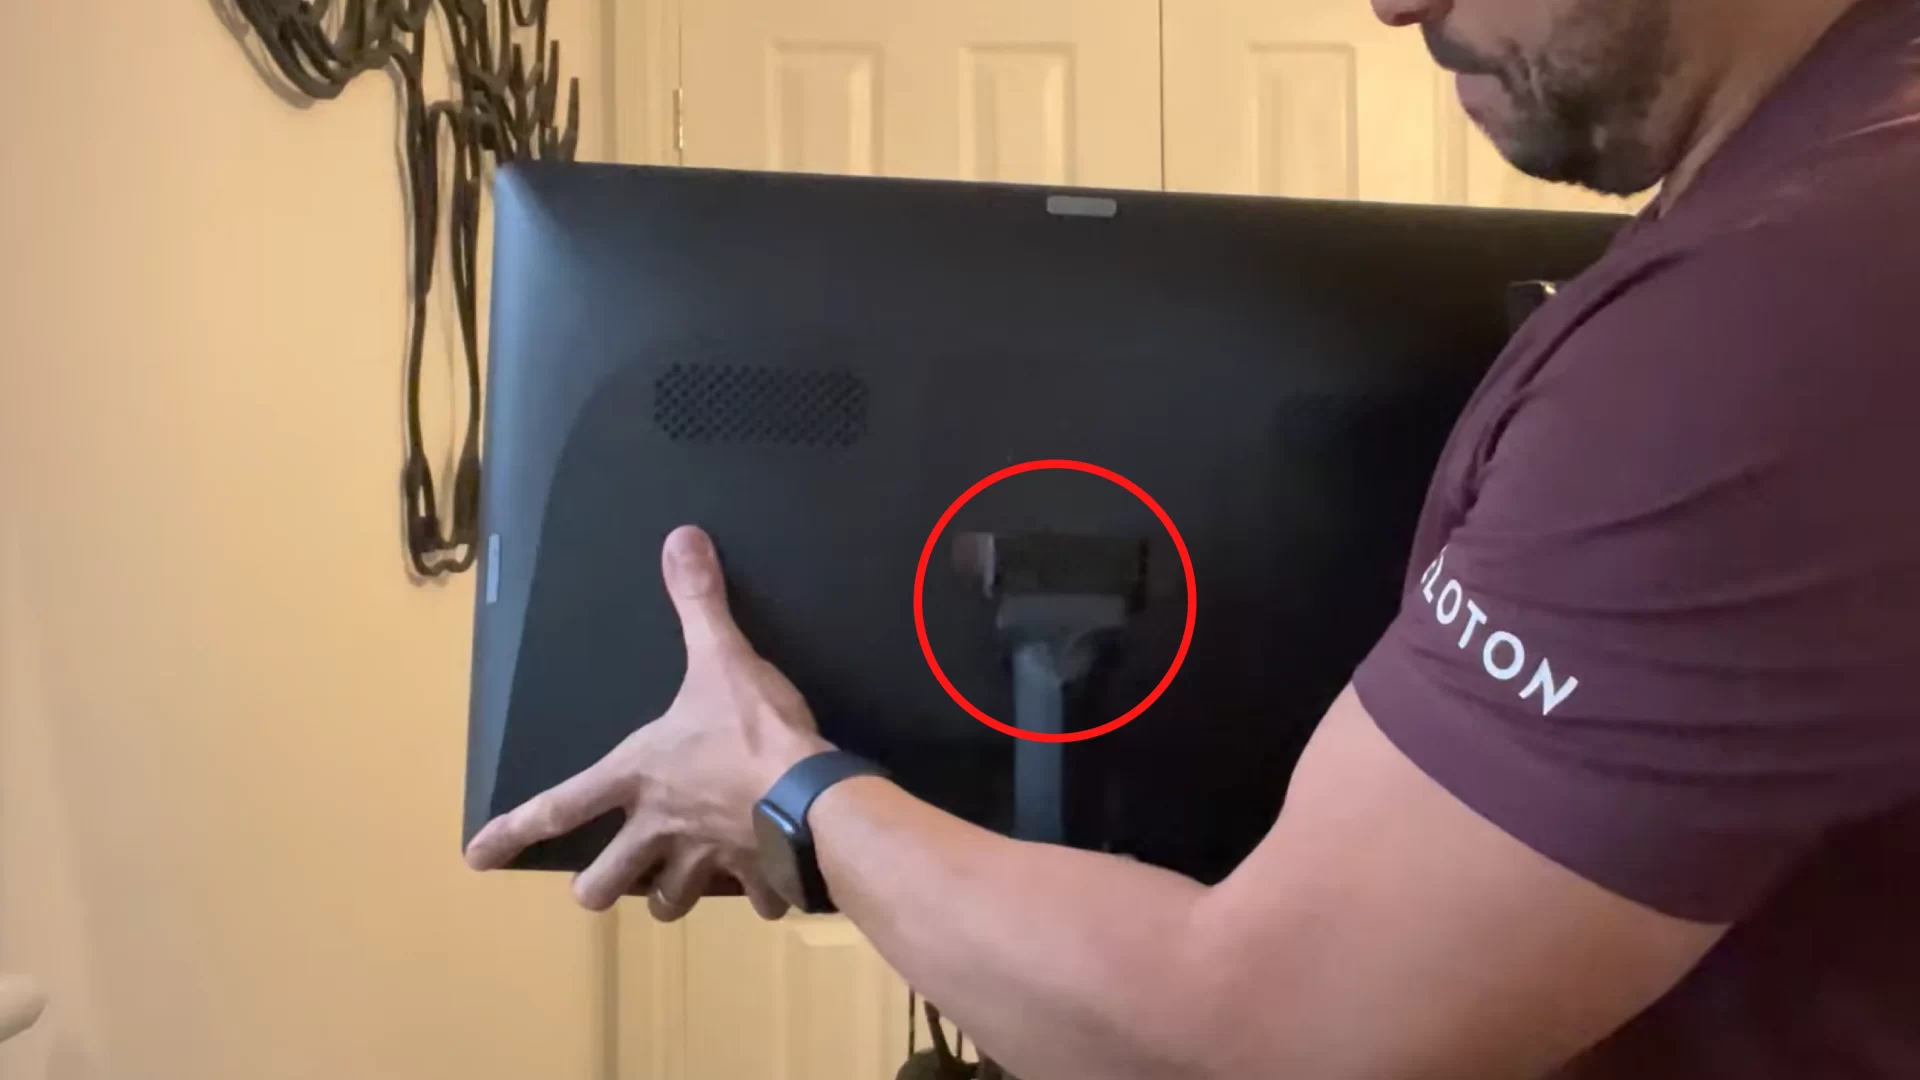
3. Removing The Rear Panel
After disconnecting all cables, you should have unrestricted access to the touchscreen’s back panel. This panel gives the Peloton bicycle a distinctive appearance. After removing it, you will discover the component that connects the touchscreen of the Peloton cycle to the real bike.
To remove the rear panel, it is necessary to:
- Identify the seam that defines the back panel’s boundaries
- Gently remove the panel of the touchscreen’s rear.
These procedures will assist you in removing the rear panel without difficulty.
Once the panel has been removed, place it to the side. After removing the touchscreen from the bicycle, You must reattach it. Place it where it cannot be accidentally walked on and destroyed. After doing this, you are ready to remove the remaining components that prevent you from separating the devices.
4. Remove Screws
Once the rear panel has been removed, you are nearly there. The screws that physically link the screen to the Peloton cycle must then be removed. It is the last stage before the screen becomes independent from the actual bicycle.
A screwdriver, which should be included in your Peloton’s assembly package, is required to remove the screws. Four mounting screws are used to connect the touchscreen to the Peloton bicycle.
5. Gently Remove The Screen
Finally, you can remove the screen from your Peloton bike with care. If all the steps have been followed precisely, this must come off without difficulty. The screen may either be discarded or packed in a cushioned box for transport.
You must enlist additional assistance when removing the screen from the Peloton cycle. Another person may remove the screws from the back while the display is supported. As a result, the display will not drop or break if the installation connections deteriorate. Now You Must Want to know the moving peloton process click here to learn this I already wrote about it.
How Can a Peloton Screen Be Reattached?
To begin, use a screwdriver with a Phillips head to take out the six main screws on the back of the Peloton.
Next, carefully pull apart the top and bottom pieces of the unit where they are seam-joined so that you may separate them. Take special care not to nick any of the wires or connections.
Now you need to find the ribbon wire that runs from the screen to the motherboard. First, give the connection a little lift on one side, and then let go of the other side.
Finally, reconnect the screen by lining it up with the motherboard, then attaching it with screws once you have ensured it is properly aligned. Before you put the cover back on the device, check that the ribbon cable is properly inserted.
FAQS
Can The Screen On a Peloton Be Replaced?
The method for changing the touchscreen on your Peloton Bike is Member-friendly but may need two persons. Please use caution. If our Customer Support Team has provided you with a replacement touchscreen, please follow the steps below to complete the repair.
How Much Does a Peloton Bike Screen Cost?
According to online research and Pelotons’ estimation, the screen cost is around $500. Therefore, total expenditures are around $600.
How Exactly Does One Reattach a Peloton Screen To a Bicycle?
- Slide the monitor back onto the monitor arm to reconnect it.
- You should use an Allen wrench with a 4 mm opening to secure the monitor arm’s bolts. Make sure that the bolts are as securely fastened as possible.
- Turn the monitor so that it is facing your Bike+.
- Plug in the power wire and the audio cord to the monitor.
Conclusion
We hope that this article helped explain how to remove the Peloton screen. Please don’t hesitate to contact us with any inquiries or worries. If there’s anything we can do, we certainly will.
Related Articles:-
- How To Replace The Peloton Heart Rate Monitor Battery?
- How To Turn Off The Peloton Heart Rate Monitor?
- How To Install Peloton on Vizio Smart Tv?
- How To Calibrate Peloton Bike And Bike Plus?
- How To Update The Peloton App?
- How To Delete Your Peloton Account?
