"As an Amazon Associate, I earn from qualifying purchases. This post contains affiliate links"
Are you having difficulties resetting your Peloton bike or bike+? If you’ve invested a lot of effort and money into your Peloton Bike, you probably want it to function perfectly. Devices nowadays are not without their issues, particularly after receiving software updates.
Resetting your Peloton equipment is the simplest thing you can do if your stationary Bike or Treadmill periodically freezes, your resistance doesn’t seem correct after a calibration check, or you’re experiencing persistent Wi-Fi-related difficulties.
Why Do You Need To Factory Reset Peloton?
Before we continue with the instructions described above, let’s examine why it is necessary to execute a factory reset on your Peloton so that your files are recovered and your data is secure. There are several justifications for resetting our computers.
- You must back up your internal or external hard disk.
- Your Peloton may be harmed if it overheats while running in the sun.
- It ruins your personal belongings, such as credit cards, debit cards, and social security cards.
- You cannot leave your residence since there are no signal lines outside your residence or even outside your apartment complex.
- Someone compromised your monitor and stole all of your data.
- Your camera is rendered inoperable and unable to record anything.
How Can I Do a Factory Reset on My Peloton?
Simply hit the “Power” button on your Peloton to start your workout. Before you try restarting it, be sure it has shut down first. If you get error messages, rebooting your computer may resolve some of the problems you are experiencing.
Everything will be explained in detail in this section, so you won’t have to constantly go over the same information. Now, go to the Control Panel and pick Backup and Restore from the menu.
You Might Also Like to Read: How To Delete Your Peloton Account? – [It’s Easy]
To choose, please select the option. Start Backing Up Now If you already have Windows installed on your computer, choose the Restore My Files From DVD Drive link. Next, select the Get Your Files Instantly option.
Finally, Simply restart your Peloton, and you will be able to continue working as normal.
Steps To Do Factor Reset Your Peloton Bike
Once again, we will walk you through the process of doing a factory reset on your Peloton in a step-by-step format.
Step 1️⃣: Press Both Buttons Together Once
When you want to start a new session on your Peloton, you need to hit the number two key on the device. Make sure the second button is engaged before you begin the restart process, and then drag it across the screen while continuing to hold the other key down.
Step 2️⃣: Turn off Your Computer
If you see any lights flashing or strange noises coming from your monitor, it is not getting the appropriate amount of watts. Please try turning the display back on to see if this addresses the issue. Once done, shut your laptop.
Step 3️⃣:Remove The Battery Cable From Your Monitor
Proceed to the USB connection, and remove the cord connecting the battery. If a cable runs across the front of your screen, you should connect it to the AC outlet on the wall. Connect your device’s USB ports to the AC outlet on the display’s side.
Peloton, do a hard reset. Start your Peloton again after ensuring no cables flowing from opposite directions that might create difficulties.
Step 4️⃣: Check Whether You Have a Memory Card Slot
If the blue LED located next to the SD slot is blinking, the device supports the use of memory cards. If, on the other hand, it is not blinking, kindly check to see if this was linked correctly or not. Please check that the memory card is plugged into the appropriate slot, and then adjust the speed to the maximum it will go.
Check to see that the Bluetooth device or dock is turned on, then click the “Connect” button. A flashing notification will let you know about the situation if it is connected but not plugged in. When you are ready, click the Connect button.
Step 5️⃣: On Startup, Press The Power button, And Click OK
To proceed, choose the hammer icon from the drop-down menu (back button of your remote control). Because of this, you will enter pairing mode. After that, proceed by clicking the Confirm Connection button. While holding down the other buttons, press any of these buttons until the others click into place.
Don’t forget to check everything over one more time. This login box requires you to enter your password, after which you will be given the option to “remember your passcode.” Tap the Next button.
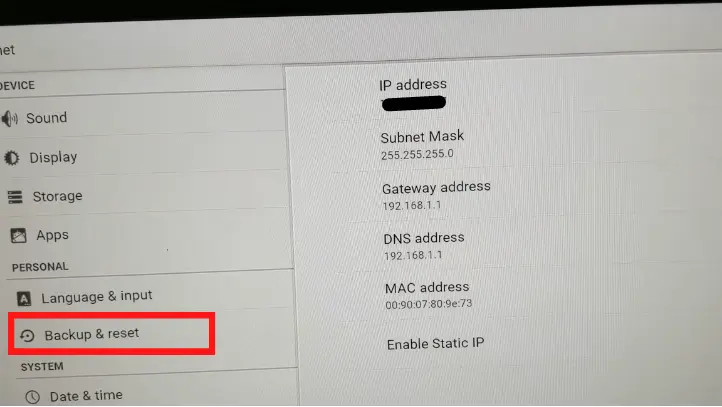
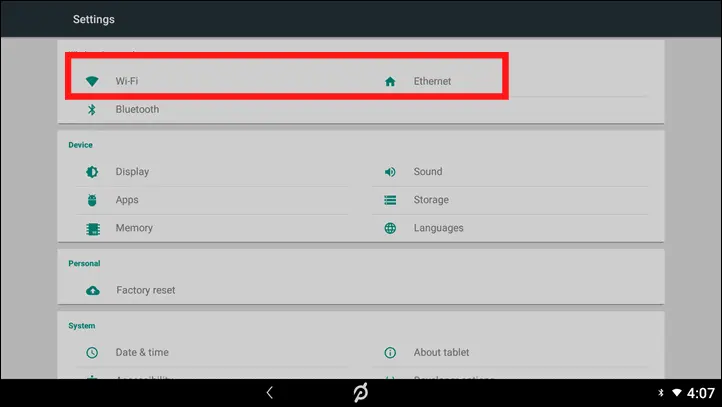
Step 6️⃣: Go Through All The Settings
Navigate to the advanced options menu, scroll all the way down, then hit the menu bar and pick the Network/Wi-Fi Settings option. To get to the bottom, scroll down. You would discover settings like Wi-Fi SSID and Wi-Fi Password, amongst other things. Scroll all the way down and input the values for each of them. Finally, choose the Advanced option.
Step 7️⃣: Change Wi-Fi Passwords
You should go through all of the available options to update the MAC address and passwords on the router. Also, activate WPA3.
Step 8️⃣: Connect Your Wireless Network
Tap the Switch to Wireless Connection button if you are experiencing any difficulties connecting to your network or Wi-Fi. To go on, choose the Add and Set up next buttons.
Step 9️⃣: Restart The Computer And Enter Recovery Mode
To access the boot menu, use the F2 key, then wait for the screen to load completely before continuing. The next step is to launch the Command Prompt and then type “reboot” to finish the procedure. Please pick the ‘Boot Recovery Mode option to continue fixing the damage. Ensure that the Windows 10 11 installations were carried out in the same manner as before.
The time required is between 5 minutes. Therefore, please restart your device and check on it as soon as possible. It has likely become somewhat clogged up.
Conclusion
I have tried to cover every step you need to perform a factory reset for the peloton bike. After reading this guide, it would be easier for you to complete a factor reset. If you feel any further issues, please comment in the section below so I can assist you further.
